A critical piece of machinery, ultrasonic cleaners clear out soiled medical devices' nooks and crannies otherwise unreachable.
This content is sponsored by Healthmark Industries
Ultrasonic, or sonic, cleaners are categorized as Class 1 medical devices, intended to fine clean other medical devices. This technology is not designed to disinfect or sterilize, but rather eliminate soil from devices' joints, crevices and lumens. Many instrument manuals recommend sterile processing departments use sonic cleaners to thoroughly clean micro-instruments, especially those with hinges and locks.
But sonic cleaners require first-rate maintenance to optimally perform their function. The Joint Commission and Association for the Advancement of Medical Instruments support the verification of sonic cleaners. The AAMI collaborated with the American National Standards Institute to create the ST79, an updated version of which has been published in 2017, is the reference for steam sterilization in all healthcare facilities. Specifically, the AAMI recommends departments test their mechanical cleaning equipment at least daily and after major repairs.
AAMI plans to release a new document, ST90, "Processing of health care products — Quality management systems for processing." This document will help sterile processing professionals begin establishing the basic framework for quality management systems in their departments.
Stephen M. Kovach, director of clinical education with Fraser, Mich.-based Healthmark Industries, understands the importance of keeping sonic cleaners in optimal condition.
"Properly utilized sonic energy can contribute significantly to the speed and effectiveness of achieving the level of cleanliness needed," Mr. Kovach noted in a May webinar underwritten by Healthmark and hosted by Becker's Hospital Review.
This executive brief outlines the inner-workings of sonic cleaners and illustrates how to properly verify these systems.
Sonic cleaners in action
Sonic cleaners combine ultrasound and a cleaning solvent to clean instruments. Ultrasound is defined as energy in the form of sound waves above the maximum audible sound level. An ultrasonic transducer produces the high-frequency sound. That high-frequency sound, clocking in above 20kHz, creates a process called cavitation, which means to implode.
A sonic cleaner operates in three steps:
- The transducers' sound waves radiate through the solution in a sonic cleaner's bath or tank, producing high and low pressures.
- Microscopic bubbles present during the low-pressure stage, beginning the cavitation process.
- During the high-pressure stage, the bubbles implode, forcing the solution into the crevices of medical devices.
"[These bubbles] are imploding and creating like small vacuums in all the little nooks and crannies that you can't get with your brush or wipes," explained Mr. Kovach. The ultrasonic process should not serve as the initial cleaning, but rather as an additional deep-clean.
It is important to use detergent specifically designed for medical ultrasonic cleaners. "The detergent decreases the surface tension within the solution and then that helps the cavitation process," added Mr. Kovach. If detergent is visibly soiled, change the cleaning solution. Dirty solutions hinder the cavitation process and cleaning power. Newer models of sonic cleaners typically recommend changing solutions after every use.
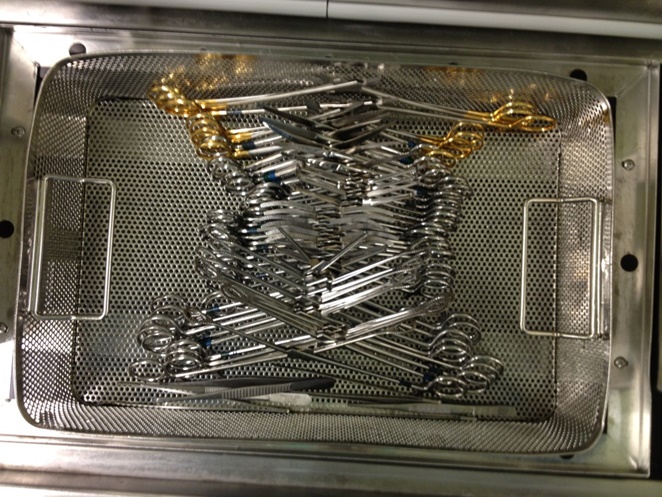
Medical instruments that undergo cleaning in a sonic cleaner are placed on trays. Do not use plastic trays to hold the instruments, because they will absorb the energy and decrease the cavitation process. In 2005, Mr. Kovach co-authored an article on the importance of tray selection in sonic cleaning: "We started to show that different trays impeded the sonic activity. You should be very careful in the type of tray you pick, because certain trays will reduce the cavitation." Besides using the appropriate trays, the instruments must also be in the open positon to allow exposure to the cavitation and cleaning action provided by the sonic cleaner. Below is a picture of instruments in a tray spread open properly.

Additionally, the ultrasonic unit requires a cover to prevent the aerosolizing. Once ultrasonic cleaning is complete, thoroughly rinse the instruments.
Trust, but verify, your sonic cleaner: 10 considerations to do so
Sterile processing technicians should first ensure a medical device is visually clean and functional, but their assessment of equipment should then go 10 steps beyond a visual test.
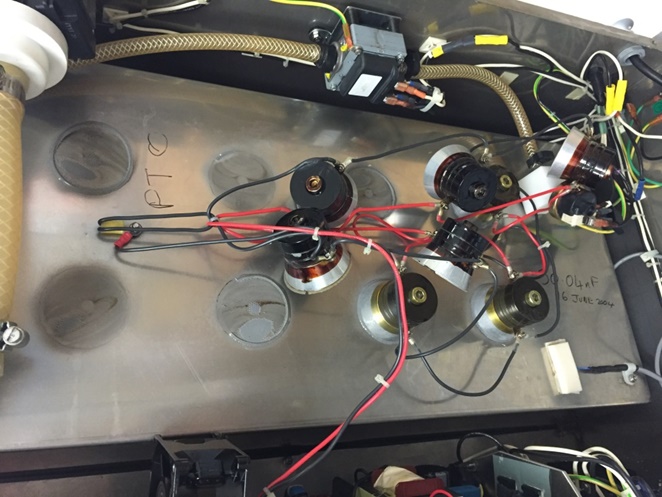
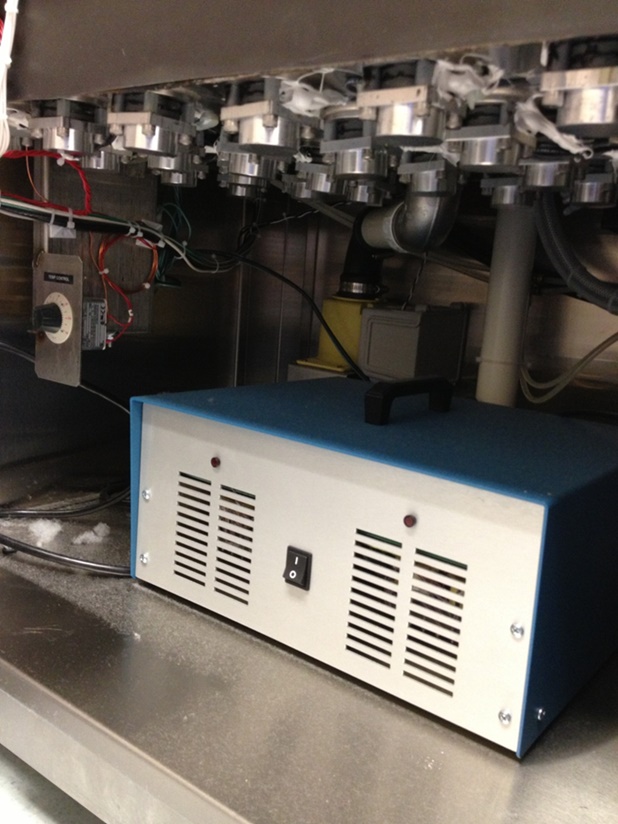
As an example of how a quick visual test falls short, look to the state of a sonic cleaner's transducers. If one transducer fails, a dead spot will form within the ultrasonic tank. But if the other transducers function normally, a quick scan by a technician will yield a false security that the sonic cleaner is performing at maximum level. The picture on the left below shows a sonic cleaner with transducers falling off from the bottom of the tanks; the picture on the right shows an intact set of transducers on the bottom of a sonic tank.


"You must verify your process. You must trust, but verify," says Mr. Kovach. "Man and equipment is a mixture that breeds failure."
Whether a sonic passes or whether it fails, understand what a test tells you. Tests analyze different things, so recognize what the one implemented measures. One test may analyze the operational level of cleaning of the sonic cleaner while another may measure a specific parameter.
Mr. Kovach created a list of 10 considerations when verifying a sonic cleaner.
1. Instructions for use. Follow this exact process every time.
2. Instrument design. Understand how to use the device and what needs cleaning.
3. Soil type. Consider how a provider uses the device. Was the instrument exposed to blood or synovial fluid, for example? If the instrument is exposed to blood during use, a technician should test the effectiveness of the sonic cleaner with a blood-based test.
4. Water quality. If the water is too hard, the cleaner requires more detergent.
5. Temperature. Ensure the temperature is proper for both the cleaning solution and instruments. If removing protein and blood particles, for instance, manufacturers recommend maintaining a bath temperature below 45 degrees Celsius.
6. Chemical activity. Check for proper dilution.
7. Mechanical action. Degas the solution, or eliminate trapped air in the solution when adding fresh solution. Degassing is critical to the ultrasonic cleaning process, because it enhances the cleaner's solution, as air impedes sonic activity. Additionally, devote the right amount of time to each stage of the process, avoiding instrument overexposure and underexposure to the cleaner.
8. Human factor. Ensure all employees load the sonic unit properly every time, by sorting and segregating different types of metals.
9. Standards and guidelines. Which guidelines are you supposed to follow based on your accreditation?
10. Quality process and monitoring. How do you verify and with which test? Create a repeatable process and establish a test to check whether the process is operating at its maximum efficiency.
Above all, Mr. Kovach stressed the importance of checking a sonic cleaner's cavitation process separately from its cleaning function. When asked if they checked their sonic cleaners at least weekly for cavitation independently from the cleaning function, 66 percent of webinar attendees said they do while 34 percent said they don't.
Although dependent on model type, professionals should always check machines' various cavitation indicators.
• Ceramic disc method: Put lead on ceramic discs and drop them into the tank. If working properly, the sonic cleaner will remove the lead from the discs within three minutes. The test is subjective and dependent on how aggressively someone applies the lead to the ceramic. Mr. Kovach noted he does not believe anyone in the U.S. still uses this test.
• Foil test: Suspend foil into the full width and depth of the solution. (Various foil test methods exist, altering the amount and thickness of the foil submerged.) Remove and examine the foil. If you see significant pitting and a uniform pattern of dents and holes on the foil, the cleaner is properly functioning. You must empty the tank so as to remove any leftover foil residue. This test is also very subjective, said Mr. Kovach.
• SonoCheckTM: Designed specifically for sonic cleaners, SonoCheckTM pieces are placed into the tank, dependent on tank size. The technology tests each zone in the tank in which they are placed tank. If working properly, the SonoCheckTM pieces should change color from blue/green to yellow. This unique test ( SonoCheck) is made specifically for testing caviation.
Mr. Kovach warned that many products on the market have no data supporting their claims.
Many departments have sonic cleaners that clean lumens; if applicable, a department needs to check the lumen test indicators to ensure the pulse flow is working properly. Check to see if the lumen items are connected to a pulse flow and that test soil, which represents what the sonic cleaner is cleaning, is removed. Michelle Alfa, PhD, established the necessity of pulse flow in sonic cleaning in a 2004 study published in Journal of Hospital Infection. If cleaning lumens, Mr. Kovach recommended technicians refer to this study.
Mr. Kovach believes implementing a quality improvement program is the optimal way to verify and enhance the cleaning process. The program should require staff members to clean and inspect the equipment on a daily basis, and confirm the sonic cleaner is capable of removing soil and producing cavitation on a weekly basis.
During the verification process, remember to document results and review the preventative maintenance agreement.
Buying the best sonic: 7 questions to pose
If purchasing a sonic cleaner, Mr. Kovach recommended buyers ask the following seven questions:
- What is the sonic's frequency?
- Can I adjust the cycle time and temperature?
- What is the warranty timeframe?
- What types of cleaning solutions are compatible with the sonic?
- What is your service contract?
- What type of training do you provide for my staff?
- Do you have independent studies on this sonic?
"Not all sonics are created equal," cautioned Mr. Kovach.
Conclusion
Mr. Kovach urged sterile processing professionals to understand the sonic cleaner process and relay this information in detail to staff members.
"Sonic cleaning is not a technology of the future — it is very much a technology of today," Mr. Kovach said.
He concluded the webinar with a clever acrostic to remember proper sonic processes:
- Sonic cleaners are designed for fine cleaning of medical devices
- Only use cleaning solutions designed for the sonic cleaning process
- Not degassing a sonic cleaner appropriately can cause poor outcomes in the process
- In-services and training of staff is key to successful sonic cleaning of medical devices
- Check sonic activity with evidence-based products

